Been a while since I’ve updated; there have been a lot of happenings around here, and unfortunately, very few of them Titan-related.
It looks like I forgot to take pictures of the feet epoxying part. Fortunately, it was relatively straightforward: I just put a bunch of JB weld in the joints and around the pins, then put the toes on and made sure there was plenty of it in all the sockets, then placed the foot in its posed position, and let it sit there for 24 hours to cure. Only the left foot needed epoxying, the right foot was already pinned and superglued with the exception of one pin on the rear toe. I just left that one upside down to cure.
Next up I epoxied the legs. Looks like I didn’t take any during pictures of this either. I seem to remember thinking something to the effect of it being straight-forward, so I didn’t need to take any pictures of it. That’s irritating, because there were a lot of those situations in everyone else’s blogs that I looked at before starting my titan, and the parts that seemed straightforward to them were never straightforward to me. And it kind of defeats the purpose of this blog a bit that I did that…
I’ll try to make up for it with description. After mixing up the JB weld, I started in the knee joints; note that the piston on the rear of the thigh needs to be cut to size before you do this part. If you’ve got pins in this joint, you’re not going to be able to fit the piston up into its slot after epoxying/inserting the pins. So you need to have it measured and in place before you actually start epoxying the joints. I had originally planned to use superglue for these because I could, but it occurred to me that while I was getting the rest of the joint in place the superglue would set before I was done, leaving me with a likely out-of-place and set piston. No bueno, so I just decided to use JB weld on it too, which was fine; with the way the thigh pistons are slotted, it’s not going to be going anywhere once the rest of the knee joint is posed.
Doing the actual epoxying was a fairly simple matter. Just score the inside of the joints with a sharp Xacto knife or something (provides some friction for the epoxy to grab on better) and then smear it on the inside of the joint, then repeat for the thigh piece. I also put some down into the pin holes a bit. However, I was using a toothpick, so I couldn’t get it that far down in there. After that, stick the pieces together, try to avoid epoxy-smearing, and then stick the pins into their holes. It turned out for me that the pins pushed a lot of their epoxy out the other end when I got them all the way in. I used a handy toothpick to make sure they were roughly centered in their holes, wiped excess epoxy off with a paper towel, and moved on to the next joint. Repeat for each joint on each leg. Once that was done, I stuck them in their respective feet and left them to cure for 24 hours. Note that the ankle joints were not epoxied yet at this point.
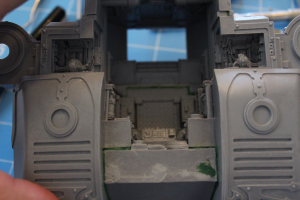
Once that was done, I did the hip joints and got them in their properly marked positions, epoxied and that was it. Here’s a picture post green stuffing (which happened after).
The original plan here was to first epoxy the pelvic piece in place, then drill it for a couple of pins afterward. However, I was so impressed with the strength of the epoxy on the leg joints that I started to think I may not need to. More on that later, but for now, this stuff is really strong.
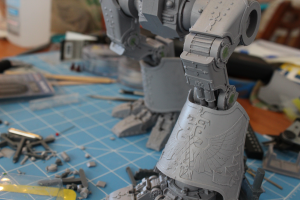
After those cured, it was time to go crazy with the green stuff. I was a bit nervous about it, since it was my first time using it, but overall, I think it turned out really well. If you’ve never done it before, you’ll need something to manipulate it with, preferably something small and pointy or shaped in a way that’s smaller than your finger. I happened to have some cheap metal dental picks I’d found at a surplus store several years before and never ended up using on their intended project. Turns out that they’re great for manipulating green stuff. Another thing you’ll need is water; you’ll want to keep your fingers and tools with a slight bit of water on them in the places they’ll be contacting the green stuff. It makes it easier to knead and it keeps it from sticking very well to the wet surfaces. You’ll want to make sure you try to keep the excess water off the thing you’re trying to apply the green stuff to, however.
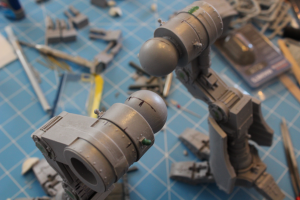
In the above picture you can see a hip piston ball joint I manufactured out of green stuff. At some point during the building process that one broke off and I wasn’t able to find it. The one I made fit the size needed closely enough to be passable. Below, gap filling galore.
One thing I noticed while working with this: I had a ton of hard pieces of the yellow stuff that refused to mix in. I couldn’t figure it out (until tonight); I had cut the middle out, where the yellow touches the blue, on the advice of some other green stuff users on the internet, but there were a lot more of these hard yellow pieces than even that size would account for. They didn’t mix in well and could ruin shaping if they ended up in the wrong place. I ended up just pulling them out whenever they were in small amounts of the green stuff and sticking them off in a waste pile. Irritating and time consuming to extract them, but workable.
Tonight, while doing some more smaller gaps, I realized what they are. The green stuff I bought comes in two strips, stuck side-by-size, with a thin piece of plastic around the long flat edges of it, but exposed to air on the thin sides. The outside of the yellow stuff had developed a hardened shell, very thin, that was exactly like these little hard yellow bits I have been finding the entire month. That’s where it comes from. The inner part of the yellow stuff is still soft and moldable (like peanut butter, even), but this outer bit breaks up a little into these small hard pieces when you mush it together with the blue stuff. Then you end up with the crappy chunks spread throughout your otherwise nice green stuff. I experimented with cutting it off with a wetted Xacto blade, but separating the outer edge from the yellow stuff is even worse than pulling the hard chunks out of the mixed green stuff, so I decided to continue with the tedious process of pulling them out when I found them.
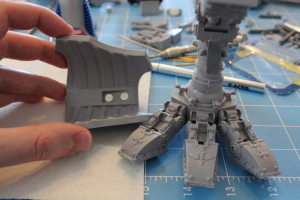
Next up, I decided to magnetize the shin guard armor pieces. I actually did this before epoxying the legs, but I’ll include it here because that’s when I took the pictures.
First off, I used some 1/8″ x 1/32″ magnets for the left leg. Bad idea. I was hoping that using 4 of them; two in the shin and two in the armor plate would be sufficient to hold the plate on. I’d seen someone else doing it this way on the internet, and I already had the magnets. It held the piece on alright, but if you touched the outer edges of the piece at all, it was really wobbly. Not happy about that. I had to come up with a way to keep it from getting bumped off the leg any time someone looked at it funny. To accomplish that, I drilled a pin hole for a short pin into the bottom of the shin piece that holds the armor, then a hole for it in the bottom of the leg slot.
For the other leg, I bought some different magnets from K&J magnetics. These worked a lot better; they’re 1/4″ x 1/16″. I decided to put two in the armor piece and use a piece of tin (bought it at Hobby Lobby for a few dollars) cut to size with a Dremel over the mounting spot on the leg. This is much, much more stable, and no irritating pin to deal with. The plate is simply super-glued, as are the magnets in their holes. I used a 1/4″ Forstner bit to do the holes for the magnets
I decided to do the tin plate because the mounting brace on the leg was not thick enough to support 1/16″ thick magnets. It would have destroyed the mount and forced me to do a lot of repairs with green stuff. In the end, the tin plate is plenty strong enough, so I’m glad I didn’t try drilling into the mounting brace for these.
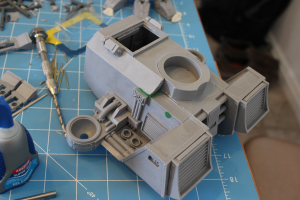
Lastly, for the pelvis, I scored the ball joints after marking the positioning with a sharpie (you can see in the first picture). Then I slathered a bunch of JB Weld on them and stuck it onto the ball joints, then let it sit for 24 hours.
That done, I put the shin pistons on. This was pretty easy to do with the legs epoxied/fixed: there was enough space for maneuvering the piston into the slot that I could easily cut them to size, put the bottom part of the piston in its socket, then pop the top part into its socket.
The pelvis turned out to be extremely solid without pins. I decided to do some balance testing with the main body sitting on top of the pelvis (I had done some before epoxying the pelvis, with some success) and it balanced fairly well in several varieties of the torso pose I was planning. The ankle joints not being epoxied was a bit of a hindrance, but without arms, it held up on its own well. After that test, I decided I probably didn’t need to drill pins from the pelvis into the hip ball joints, which is nice. This JB Weld is really strong (I know, I already said that), and I really didn’t want to have to drill more pins than absolutely necessary.
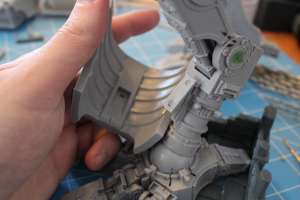
Next up, magnetizing the arms. I put this one off for a long time while I tried to decide how best to do it because I was terrified of screwing it up.
