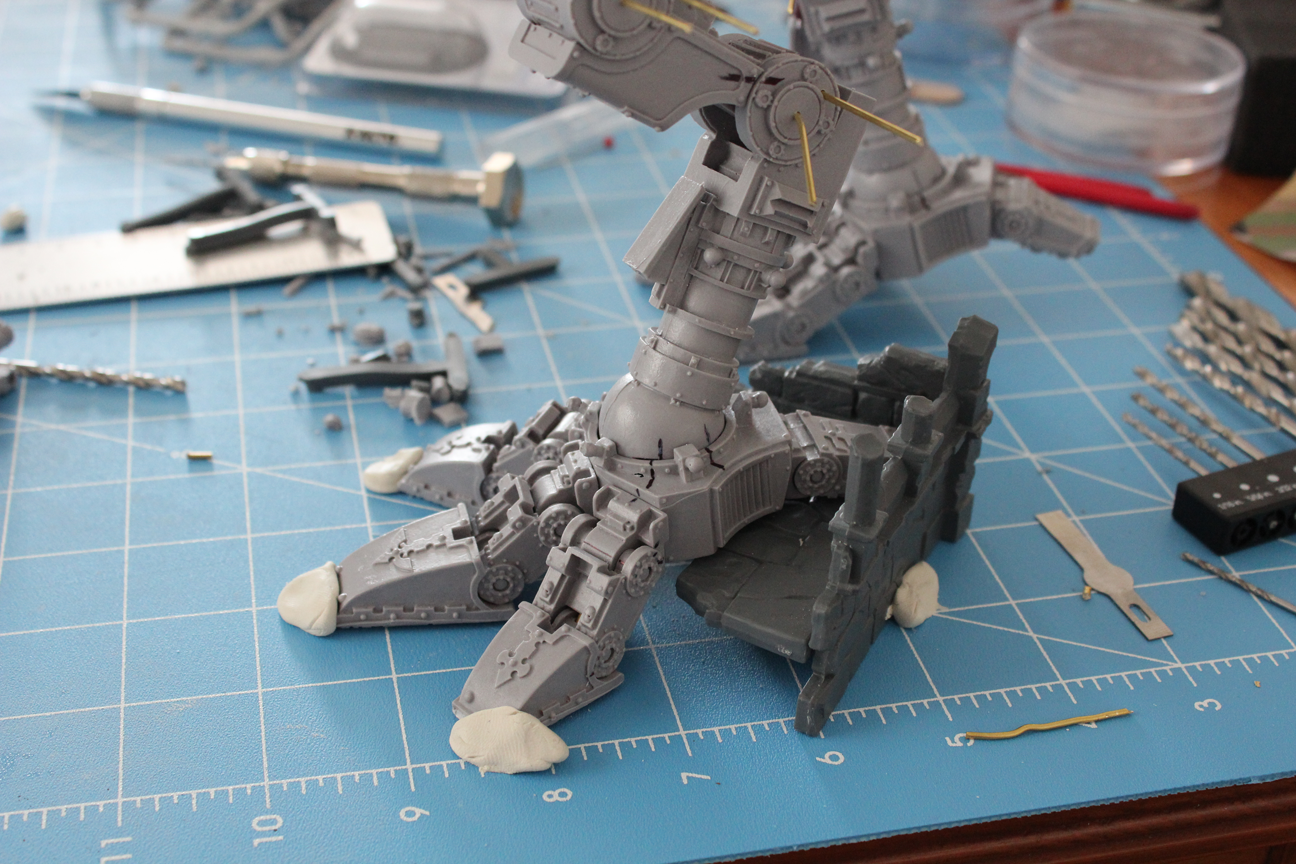
On to the main body. It took me some time to get this part figured out. A few things I noticed while doing the endless dryfitting– no really, I spent like 2 days dryfitting these before deciding exactly where to put pins as well (granted they were work days, so more like 2 evenings)– first, the sides of the back did not fit well with the middle of the back (the reactor). I couldn’t get the boxes on the sides to fit flush with the spaces in the reactor piece. I spent a lot of time fiddling with these and trying to find out why they didn’t fit properly. Turns out that the side pieces have a small nub of resin sticking out that is supposed to go into the corner of the reactor piece.
These nubs have to be lined up properly in order for the side piece to sit flush with the side of the reactor, but when you get it lined up in the corner of the reactor room, the boxes on top and bottom don’t line up at the same time. According to the blog linked in my last post, this is pretty common to all Warhounds. I also discovered that the floor of the reactor was going to be very difficult to line up properly with the front of the main body. Eventually I just decided that I was going to have to do my best and then fill in the gaps with green stuff. I wasn’t willing to make the cuts necessary to make some of this stuff fit; and in truth I wasn’t sure it would work. I didn’t want to cut too much and find I’d screwed up the model.
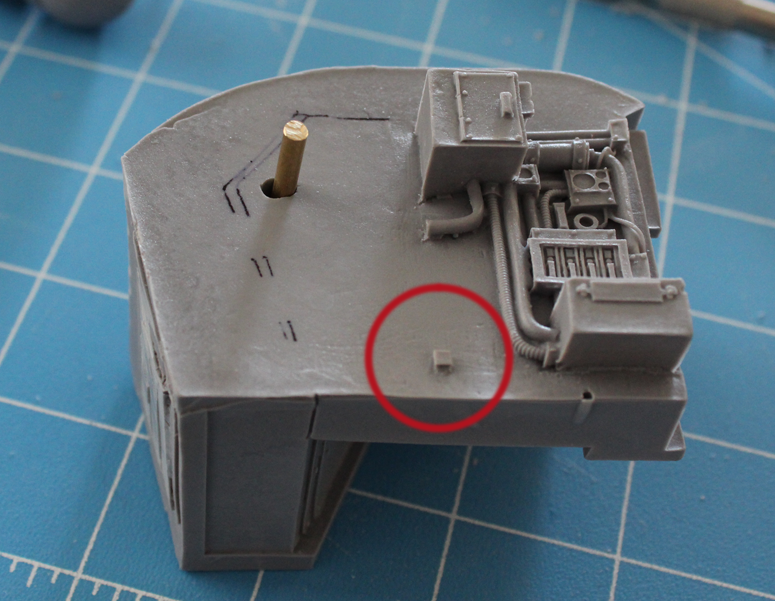
Anyway, on to the pinning. As you can see in the above picture, I did some more sharpie marking to find pin hole positions. I didn’t want to drill the large 1/8″ pins all the way through the body so they’d be visible from the outside, so that meant I needed to mark out the pin holes because I’d have to drill them separately. I did this by marking with the sharpie where the back edge of the reactor met the side piece. Then, I chose a spot that looked good on the reactor piece and drilled. From there, I used a ruler to measure how far from the corners the edge of the hole was.

Then, with the edge markings I’d made on the side piece, I could mark the edges of the hole on it, then drill. As you can see in the first picture, I didn’t get the location quite right on the first one. It fit almost perfectly when it was the first hole, but once I fitted the second side piece to the reactor, the fit wasn’t as perfect. I also found that the sides of the reactor are slanted slightly; they’re not straight up and down. The side pieces are pretty close, so you need to decide which is going to be “flat” for your pin. I ended up drilling more or less straight into the slanted face of the reactor piece (90 degrees perpendicular to the plane of the side where the measurements were taken). That would put the pin poking at a downward angle into the side piece, which required a bit of a hole adjustment. I figured no problem, the epoxy would need some space to hold the pin in.