I did a fair amount of research before starting on this project. I’d been thinking about it for several months before I finally worked up the nerve to spend the money on the model. I’ve always dreamed of having a Titan, and now I’ve got one, I don’t want to screw it up. I knew going into this that it would put all of my modeling skills to the test in addition to forcing me to develop new ones. Well, so far I certainly haven’t been wrong. I made a few mistakes, but so far I’ve been able to correct all of them (or at least mitigate them). I’m going to include some pictures below of what I did along with my thoughts on the approach.
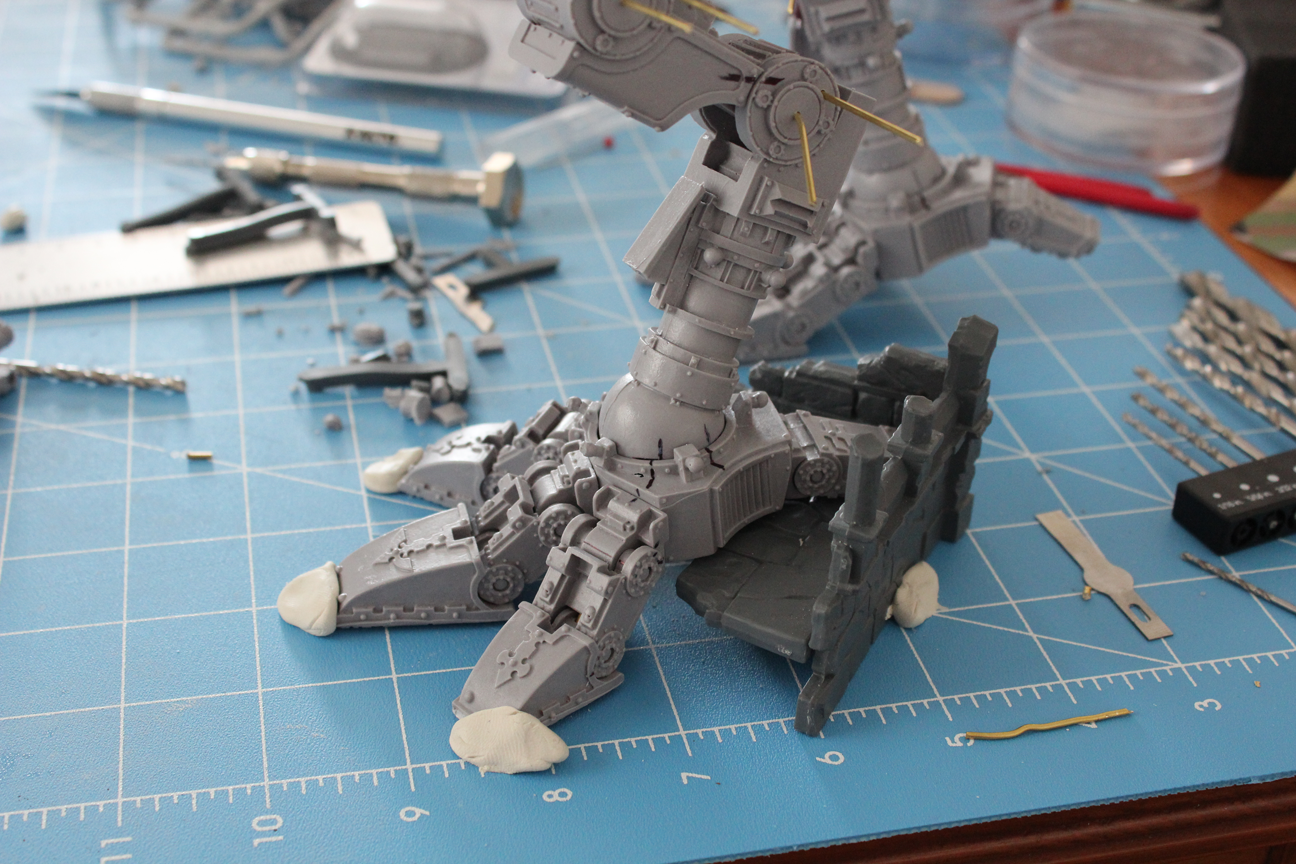
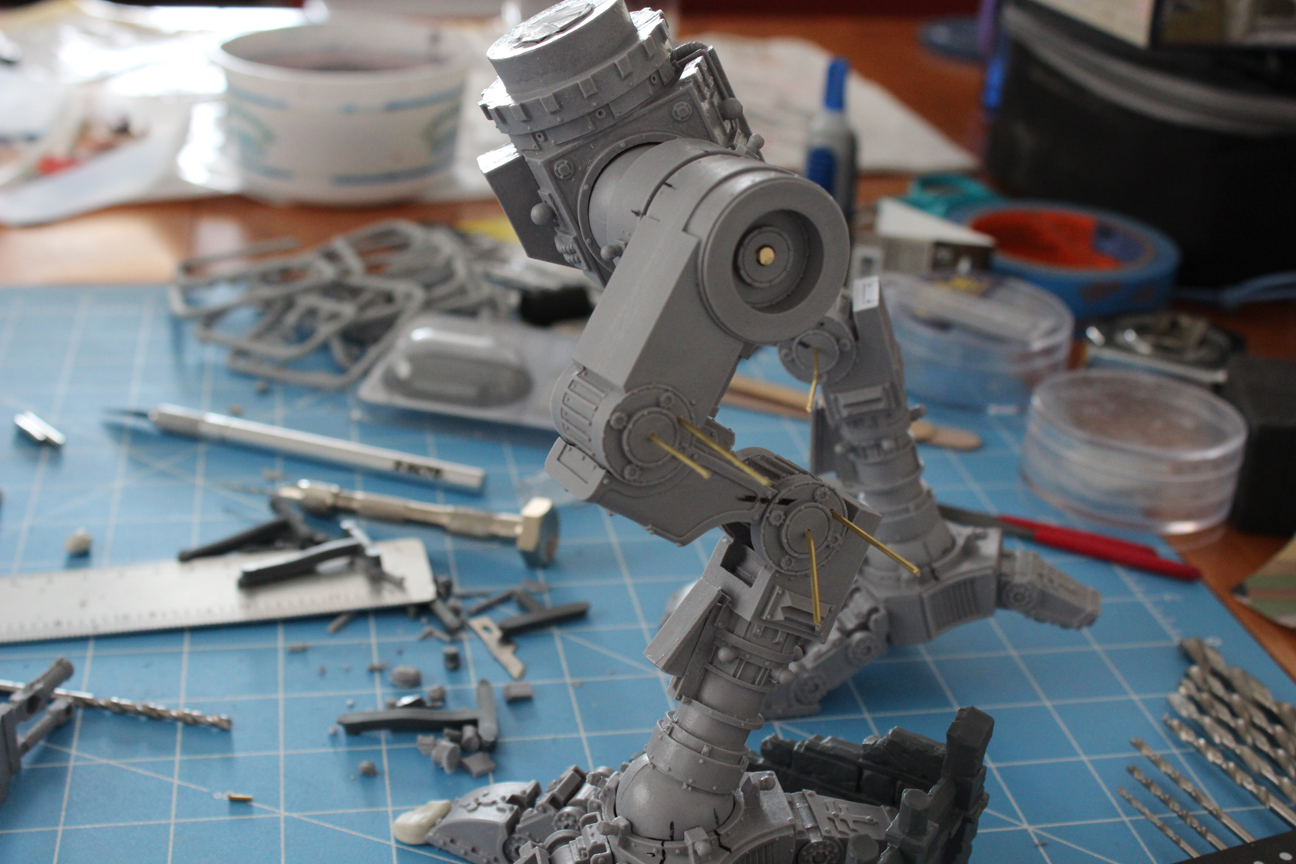
After doing a bunch of looking around, I decided I wanted a dynamic pose. A straight up and down pose would be easier, but frankly, I think a lot of the flat-footed poses look kind of boring. If this is going to be a centerpiece model for my collection, I want it to look good. Eventually I decided that it would look really cool to have the Titan prowling through some ruins as if hunting some elusive enemy. It took forever to find the ruins that I eventually decided to use. I had initially planned to have it stepping onto the ruins, perhaps with the toes, but once I got some feasible ruins, I found that it was not likely to be a natural-looking pose with just the toes on the piece, so I decided I’d have the Titan stepping over the ruins as if it were just putting its heel down on the other side of a smashed wall. The ruins come from GW’s Ruins of Osgiliath set. I’m only using one of the pieces right now; the rest are either going to end up on the base or on my table as terrain.
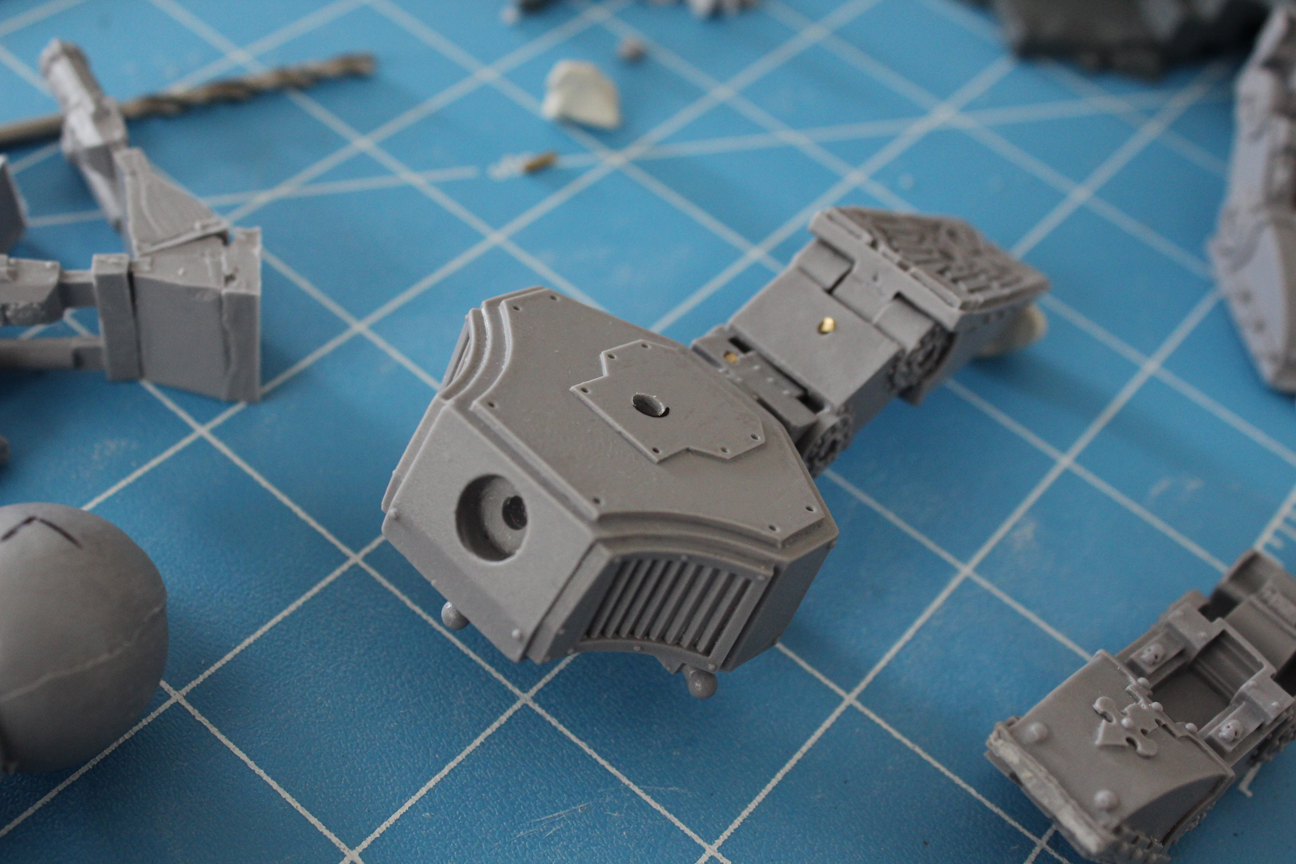
So, first things first: get the feet done. Starting with the left foot, I spent a ton of time dry fitting (not kidding here, I spent like 2 days dry fitting and trying different poses) for just the foot. I used a bit of poster sticky-tac (not sure if that’s the real name or just what everyone around here calls it) to hold bits in position.
For pinning I decided that I wanted to try to get all the pins put together before attempting to glue anything. In theory, then I could hopefully correct any problems before they became “permanent.” I had never pinned anything before this, since everything I’ve built has been either well supported or so small as to not need them, so this was all brand new to me. I decided to drill out the center of the middle part of the toe, planning on putting one pin through the entire length of the toe. My reasoning was that once that was done I could put the drill bit through it into the tip of the toe or into the joint onto the foot at the angle I wanted and thereby keep it lined up properly. I could drill out the center of the middle piece because the pin would have to go through there straight regardless of the angle of the other toe pieces.
I don’t recommend taking that approach. It’s very difficult to hold the toe pieces in the proper alignment. I was using a 1/8″ pin through the center of the toe (turns out this is overkill) and using a power drill on a very slow setting to get through all the length of resin. After doing two front toes and the rear toe like this, I decided there had to be a better way and spent some time researching alternatives.

I finally came across another method, talked about here: http://wildboarblog.wordpress.com/works-in-progress/warhound-titan/
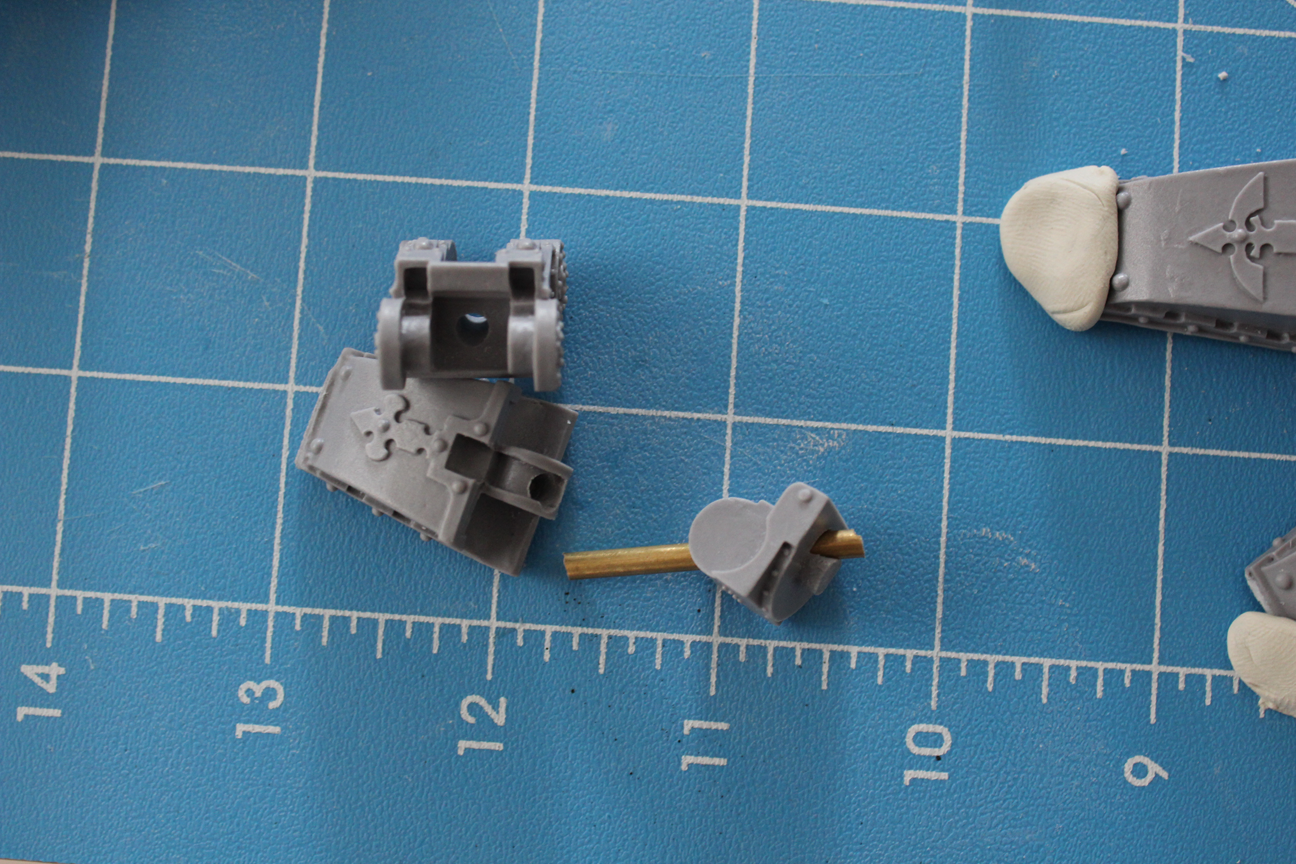
I started by gluing the remaining toe on the left foot, and all of the toes on the right foot, then drilled much smaller pins (1/16) through from the center into the tip, then from the foot-joint into the center of each toe as below. I used superglue to seat these pins. It worked, but as you can see in the pictures below, some of the pins got set in the glue before I was able to get them all the way into their holes. This isn’t a very big deal, since it’s the underside of the foot, but still, I wasn’t terribly pleased with the result. Since I wasn’t about to destroy the toe with an attempt to dig the pin back out and reseat it, I’ll just have to cover it with green stuff (another thing I’ve never used before) later when I’m covering over all the pin holes. Due to the issues with the superglue, I decided to use JB Weld epoxy on all of the other pins (haven’t done that yet). It’ll take longer to set, but I shouldn’t have any issues with not being able to get the pin in all the way and being unable to do anything about it; additionally it should form a stronger join.
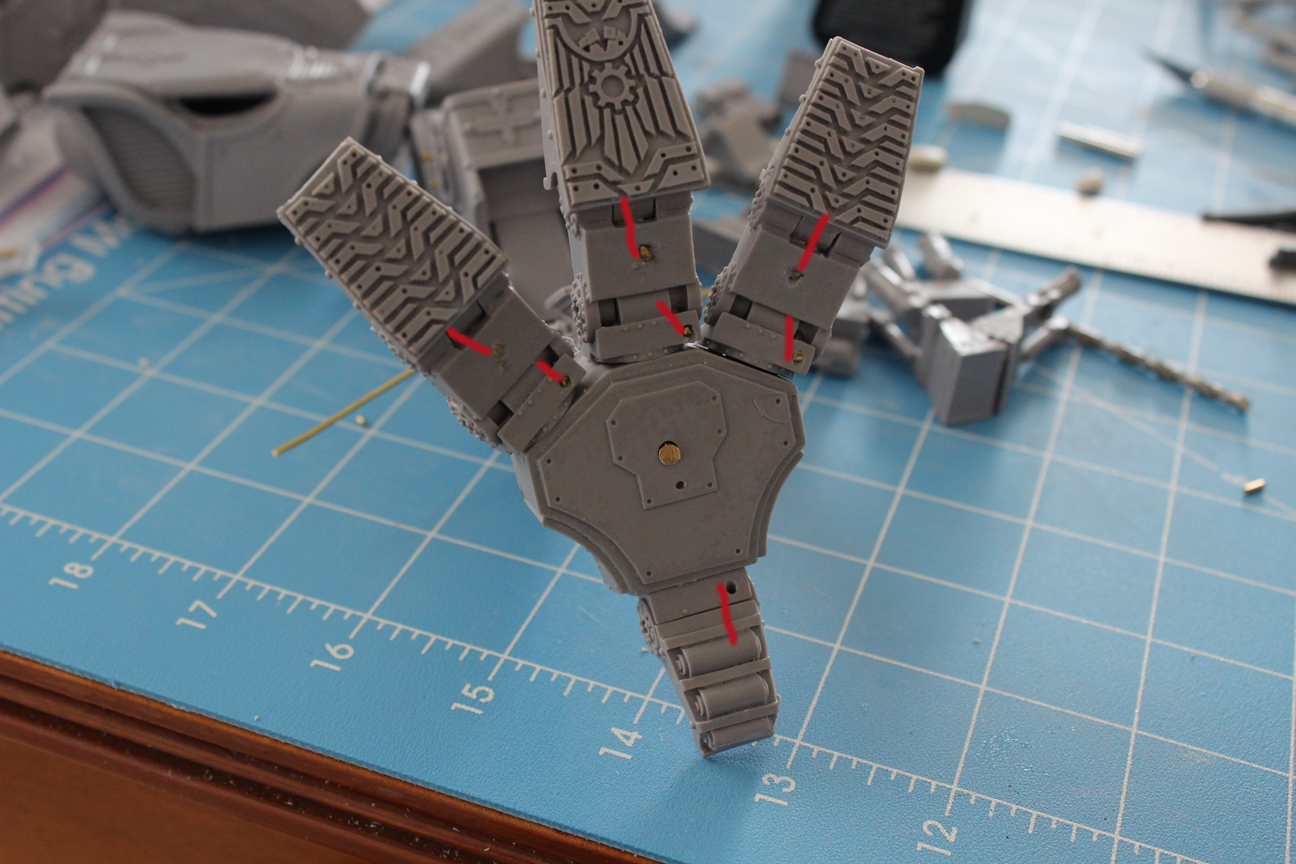
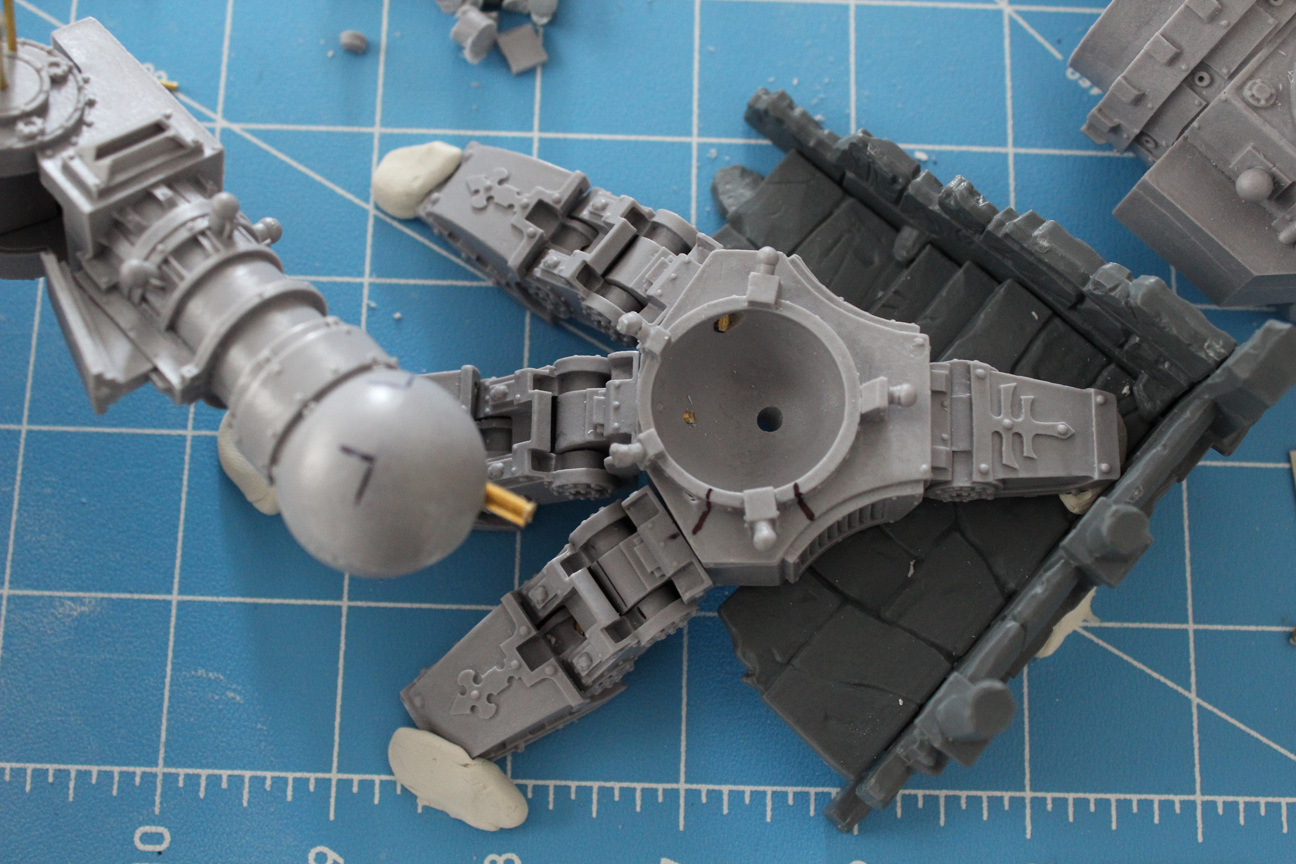
I’ve drawn some red lines on a couple of the pictures to try to demonstrate pin directions. I included the other two so you could more clearly see the pins without the marks. The pictures with the middle toe only are the left foot and the other two are the right foot.


In this last one you can see the hole I drilled for the rear toe’s pin. It ended up being a good idea to use the 1/8″ pin here anyway, overkill or no, since this toe will be bearing a lot of the weight for this foot and the model in general. To get that, I first drilled through the center of the back toe joint that meets the foot, then held the toe itself in the position I wanted and drilled into that. I inserted a pin into the resultant hole in the toe and used the ragged edge (I hadn’t done a good job cutting it off cleanly) to slightly score in the socket on the main foot piece. That told me where to drill for the pin on the foot. I’ve also seen suggestions about putting black paint on the end of the pin and marking it that way (it’s probably quite a bit more reliable than my method).
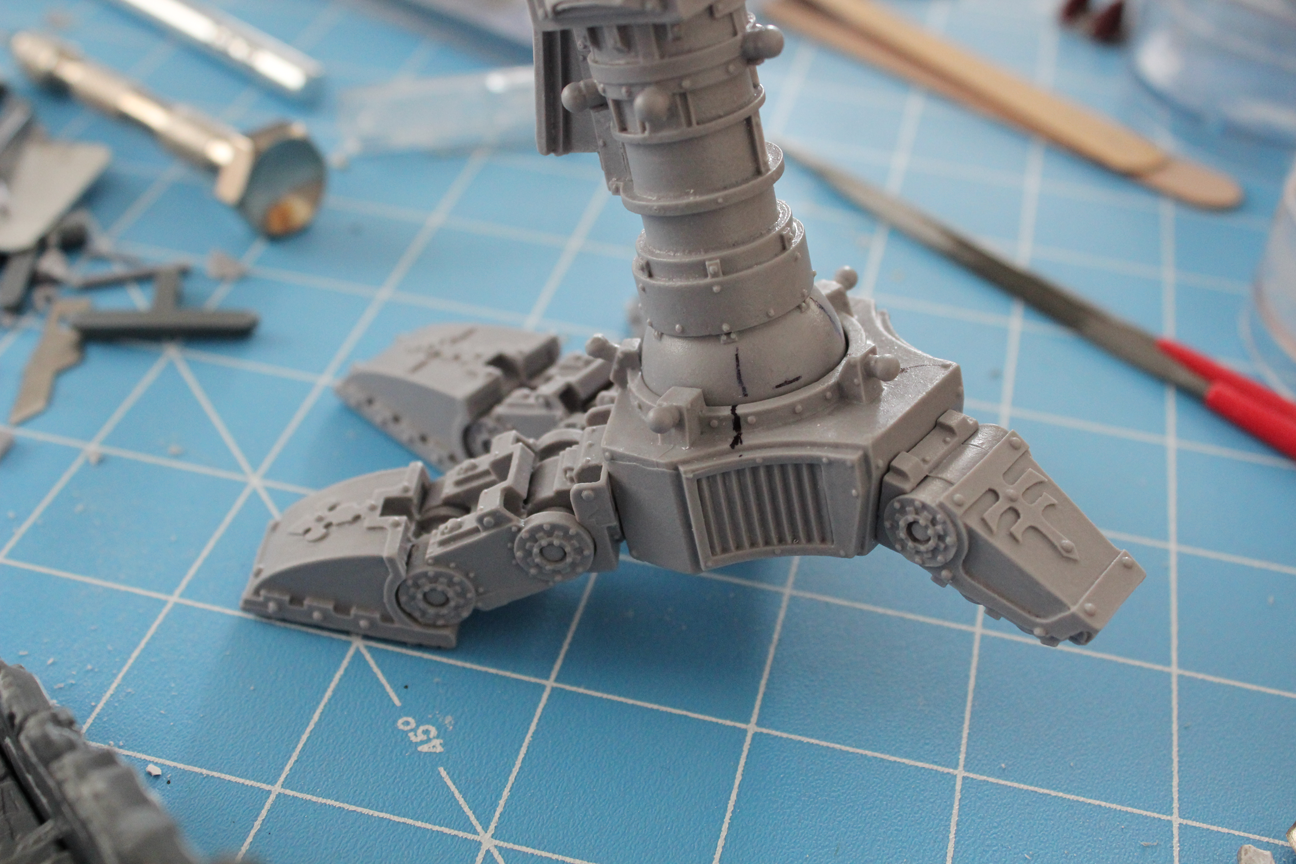
Once that was done, I moved on to the right leg. I read on the above-linked blog that it’s advisable to do the rear leg first in order to avoid making the front leg too long. I completely agree with that, particularly since the left leg on my pose is going to be somewhat elevated. My build of the right leg is much like his, since it fits the posing fairly closely to what I want, so I’ll refer you to that for foot positioning tips.
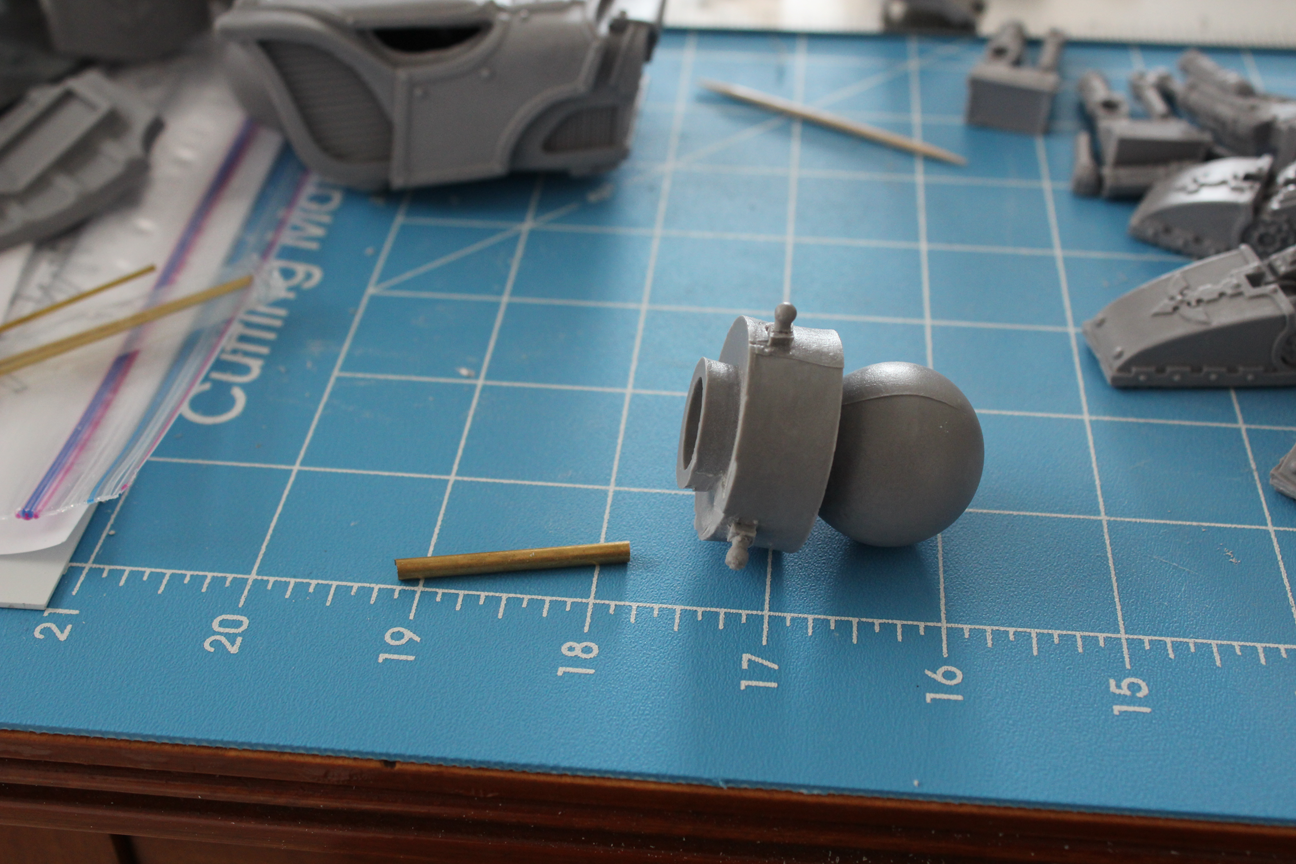
I first marked the level of the ball joint, then put some lines across the foot and ball to mark rotation. After that, I drilled straight down with the 1/8″ bit through the bottom of the ball socket in the foot, then holding the leg in place with the lines for guidance, drilled up into the leg. This was much easier to hold steady than the toes since the pieces are so much larger.

At this point I used some more sticky tac to get a better idea of what I wanted the leg joint positions to look like. It was pretty unstable, but served enough to indicate roughly where I needed to get the joints. You can see some of the marks I did with a sharpie in the above picture.
Here I had run out of the 1/16 pins I had for the toes, and didn’t want to drill a fat 1/8″ hole into these joints. I had picked up some 1.25mm brass pins from the local gaming store (the Privateer Press brand), but these were disturbingly flimsy on their own (after some experimentation it turns out they’re plenty strong in the right configuration). Again, following a suggestion from the above-linked blog, I tried drilling one pin straight in from the side to about halfway through, then another from the side at an angle, also to about halfway through. See above and below.
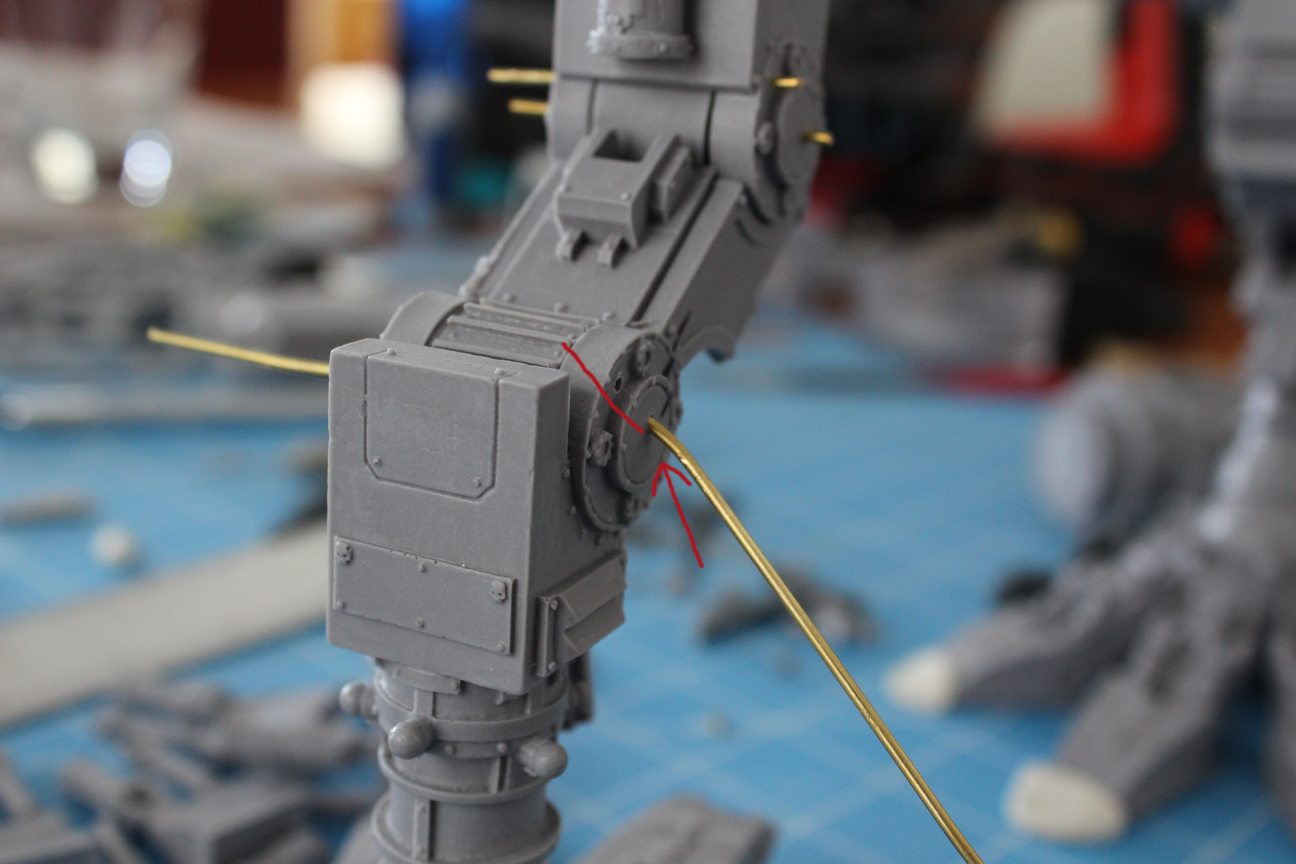
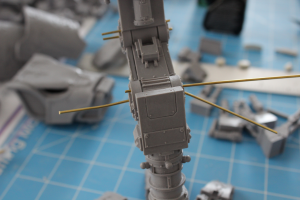
The angle is a bit difficult to see since the pin on the right is bent just before it goes into the hole. The guy on the other blog was using steel pins from paper clips. Not sure how much difference that makes in this case here, but I found that with just these two pins, the support was insufficient. There was quite a bit more flex in the joint than desired, so I stuck a third pin, all the way through the joint, at a wider angle to prevent rotation. This resolved the problem and gave it a lot more strength. On the knee joint I decided to simply do two pins straight through all the way. You can see them in the above picture. Having them meet the outer part of the joint on both sides seemed to make a huge difference. The knee is quite strong with just the two pins going all the way through.
For these joints, I used the power drill again on a low setting. At one point the drill bit actually started to heat up the resin near the outer edge of the hole to the point that it became soft. I panicked a bit and pulled the bit out slowly; no permanent damage, fortunately. Just a healthy reminder, don’t leave the bit in there too long and don’t run it too fast. These were quite easy to do with the power drill because I could set the leg down flat on the table and drill straight down, then lift it up again when I was close to the end to prevent damage to my cutting mat.
Once all of the joints were pinned the right leg balances on the toes on its own, as hoped.
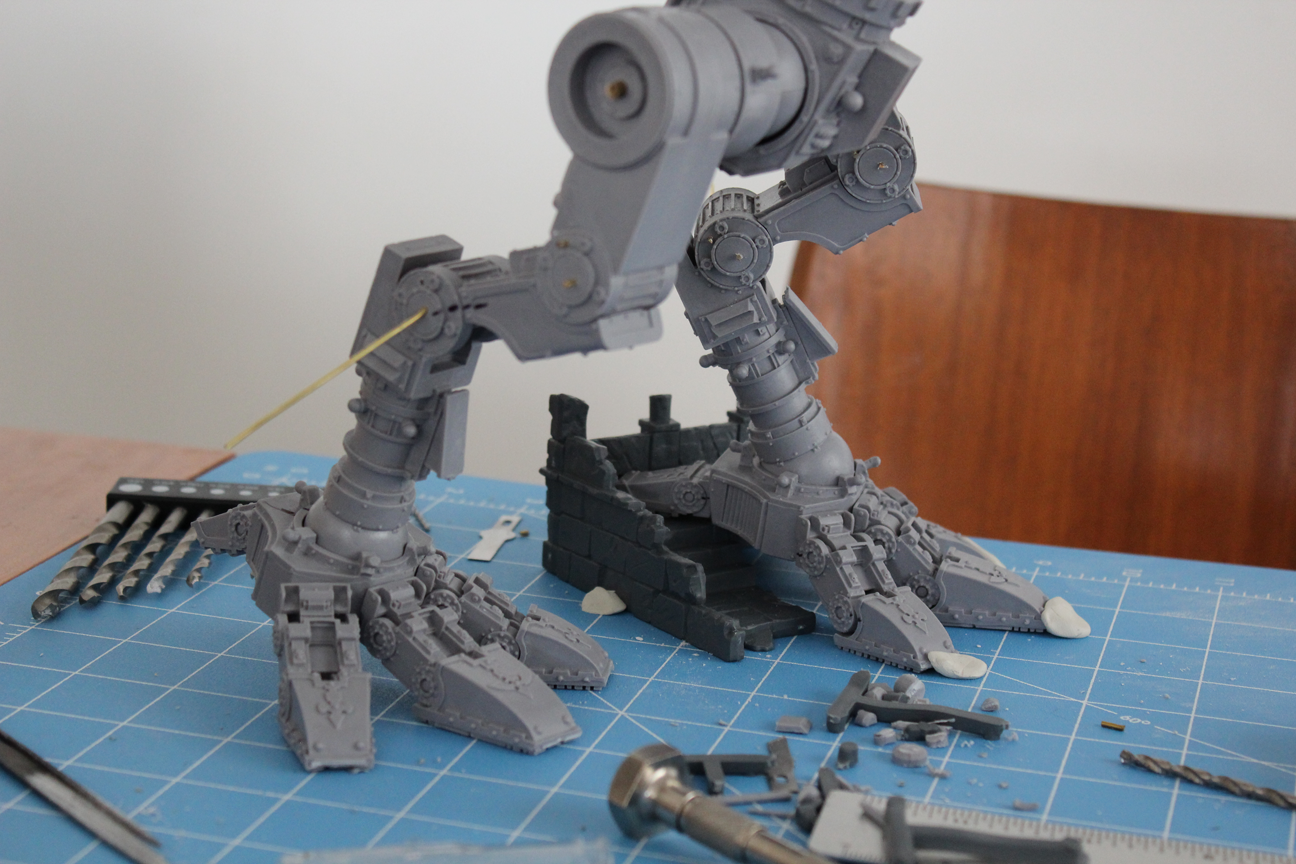
The left leg was much easier to do after the experiences with the right leg. I just used the two-pin method on both leg joints. One in the middle, one on the outer ring. All of these pins are the 1.25mm brass.
I put the outer pin in the middle of the outer ring rather than in one of the bolt casings (there are a few of them around the joint) because I was more confident in my ability to make them look flat with green stuff afterward, than I was in my ability to not screw up the bolt while drilling and be able to repair it if I did mess it up. Before doing the pins for these joints I had done another 1/8″ hole through the bottom of the foot and into the ball of the ankle joint. This one I did while holding the pieces together with my hand since it was at a rather steep angle, I wanted to make sure I had the bit aligned properly.
Last up in this post, hip joints. I decided to do another 1/8″ pin here since the hips will be holding a lot of weight. You can see it in the second-to-previous picture. I pretty much just put the thigh piece down and drilled straight down (although I ended up going a bit crooked, that’s why the pin is off-center in the picture below). After that I went through the hole drilled in the hip while holding the ball joint piece in place.

Once those pins were all in, I inserted the hip joints and started messing around with the pelvis and foot orientation. Lastly, I drilled a small stabilizing hole for a 1.25mm pin in the base of the right foot to keep the shin from turning in the ankle joint. You can see it in some of the earlier pictures. Below is the final pose from another angle.
Next up, pinning the main body, and after that, adventures in epoxying!