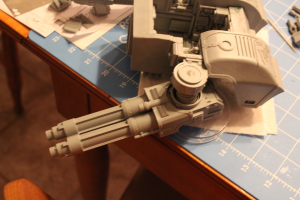
Time to do the arm magnetizing. I was both excited and terrified of this part. I’ve summarized titan construction to my friends a couple of times as a series of decisions you have to make, and some of them are very hard. They’re the type of decision that if you get it right, the model looks awesome; and if you get it wrong, you may have wasted 500 GBP.
Well, figuring out the arms ended up not quite as good as I wanted it in a couple of respects (cut wasn’t quite straight, magnets not quite centered), but turned out better than I hoped in most others.
First off, on advice from the guy who runs the blog 30mm Madness, I decided to go with K&J’s stepped magnets, and went with the 1/2″ x 1/4″ thick variety. I was worried they may not fit with enough space left over in the arm joints, so I initially considered a different way of mounting the arms than the one recommended on 30mm Madness.
My plan after measuring sizes was to put one magnet inside the ball socket on the arm and hold it in with epoxy. I’d probably need to drill out a bit of the socket for the magnet with a Forstner bit. I could then sheer off the corresponding ball plug and mount the magnet in there, with the added space of the wider ball plug providing me lots of resin in which to mount the magnet. This approach would have the added benefit of having very little work if/when I ever bought additional Warhound arms. Additionally, if the cut was ugly, it would be mostly hidden by the inner part of the weapon arm’s ball socket.
The alternative, was to do it the way 30mm Madness recommends: cut the arm section with ball plugs in half, epoxy one half into the main body’s shoulder joint, and the other half into the weapon arm, with magnets mounted in each half. I had measured the width of the arm section and knew it was bigger around than the magnets, but it wasn’t by a whole lot, so I was worried I’d screw it up or there wouldn’t be enough resin to support the magnet well. The downside here is more work for new arms, the upside is that it would be significantly easier to get the angles right on the cuts. If I screwed up the cut and it was ugly, it’d be out in the open for everyone to see.
In the end, I decided to do the second approach, because I was more confident in my ability to cut straight through the middle of the ball joints than I was in my ability to get the angles right if I did the first approach.
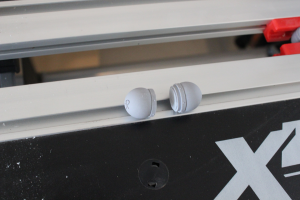
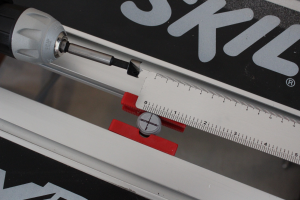
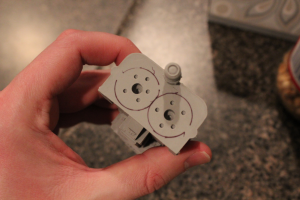
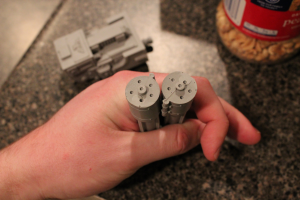
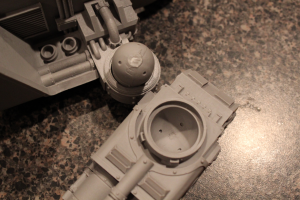
I used a cutting wheel on my Dremel to cut the pieces in half, mostly straight. It took out a bit more material than I wanted, but at least the only real side effect that would have would be to give me a bit more space in which to mount the magnet. Next, I tried to find the center of the cut by measuring the diameter with a ruler. I got it fairly close, then drilled a pilot hole for the Forstner bit with a small drill bit. I used a power drill for this, going fairly slow. It’s important to periodically check with the magnet to see if you’ve drilled far enough; you don’t want to drill too deep and you definitely don’t want it too shallow. Once the magnet was sunk enough, I drilled a small relief hole from the side of the piece to the bottom of the magnet hole. This allows excess epoxy to come out when you smash the magnet down into it.
After that, time to do epoxying. To be safe, I rewashed all the arm components at this point, to clean off any extra resin dust and any release agent that hadn’t come off in my first wash through (because, honestly, my first washing was somewhat slapdash; I was excited and washing lots of resin pieces is boring). I should add that before epoxying anything I had rewashed them all using dish soap and hot water (not hot enough to warp the pieces, though).
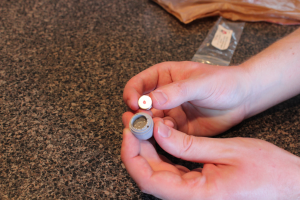
You may note I’m not using gloves here. Should I have? Maybe. Did I get any on my fingers? Yeah. Did I notice any long term or short term negative effects/irritation? No. However, I did wipe any excess off my fingers with a paper towel within a minute of it getting on there and washed my hands with soap and water after I was done. I’m not going to advise you on whether or not you should use gloves, I’m just relating what I did.
You can see the relief hole near my left thumb. I marked the side that was going into the hole with a sharpie to keep it straight. Always mark your magnets this way before putting them in, and to be safe, check it three or four times before you mark it. I’ve only had problems once with putting a magnet in wrong polarity up, and that was when I rushed things and didn’t mark it properly. Digging a magnet out of a piece is not something you want to have to do, particularly if that means you’d have to buy an entirely new arm (or remanufacture the piece from scratch) to fix your mistake.
Once you’ve got the epoxy all in the hole, line the magnet up with it and mash it down in there as far as you can. I had a bit of excess epoxy, sometimes more, sometimes less, come out of the relief holes on each piece. Some of the relief holes were drilled at such an angle that it opened up space for excess epoxy to go up into the stepped in portion of the magnet. Wipe the excess off the hole and off the top of the magnet with a paper towel, then set the pieces down (well away from each other) and leave them alone for 24 hours.
I should also note that these magnets are strong. It actually hurt my fingers a bit from getting pinched when I pulled them apart. To give you an idea, at one point while I was working with the smaller magnets for the shin plates, from the last post, I had set them down on my work mat while investigating some sizing with these magnets. I moved my arm over the table to put these back down in their place (away from everything else) and they started pulling the smaller magnets toward them. These were 8 inches up in the air at the time at their closest point, and they had enough magnetic force to pull 3 1/4″ x 1/32″ magnets half an inch across the table in the short time my hand passed nearest them.
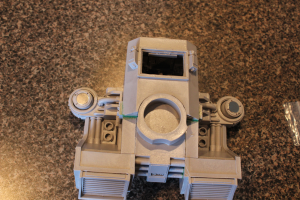
After those cured, time to put the upper section into the shoulder sockets. Same process here, smear the JB Weld liberally on the ball joint and stick it into the shoulder socket at the desired angle. This took a bit of posing before-epoxying to determine what angles I wanted. I unfortunately don’t remember if I did much scoring on this ball and socket or not. At the very least, with the word “top” carved into it and the hole in the top of the shoulder socket, I wasn’t too worried about it having enough things for the epoxy to grip on. Left this one overnight for 24 hours to cure.
You can see I didn’t end up getting the magnet holes exactly centered, but it hasn’t been a really big deal.
While that was going, I decided to use up a bunch more of the epoxy I had and just get the turbo laser arm done. I thought about pinning it, but I honestly didn’t think it was necessary, and ran a certain risk of me screwing up the peg. Or misaligning the pin and creating a bunch more work for myself or something else equally dire. At any rate, the JB Weld had shown itself to be plenty strong, I decided a pin would be a lot of work for little benefit.
That said, I decided to implement a technique I had seen a couple of days before on the Wild Boar blog (linked a couple of posts ago). Drill shallow, small holes in the surface to be epoxied to provide some texture for the epoxy to grip. I did these with my pin vice in 5 or 10 minutes. It was a bit tedious, but turned out to be really effective. I smeared plenty of epoxy onto the surfaces and made sure to get it down into the holes with my toothpick.
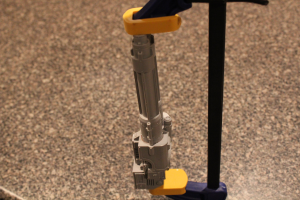
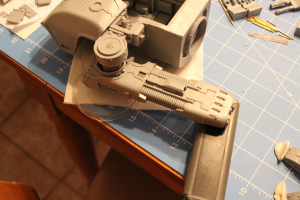
There was pretty much no way I was going to get these to stay straight on their own while it cured. So I busted out the clamps again.
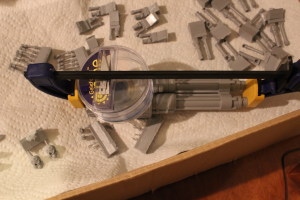
I noticed while clamping it that it had a tendency to bow (middle toward the bar of the clamp); so I pushed the middle back out so it stayed straight, then set it down to cure for a while. I came back to check on it an hour later just to see if my one-time push had been sufficient, and it hadn’t, so I found some stuff to wedge between the turbo laser and the clamp bar to force the middle of the turbolaser back to straight. The flocking tub and a spare Xacto blade case gave me just the right amount of pressure to keep the joint straight. After curing for 24 hours, it’s either straight or close enough that I can’t tell by eyeballing it, which is good enough for me.
After those all dried, it was time to put the ball plug into the sockets on the arms. I did these one at a time because it was easier to pose them that way. First, I drilled out some grab-holes in the ball joint, then added a liberal slathering of epoxy (make sure to get it inside the holes). I put the arm-side of the ball joint onto the shoulder-side, then stuck the arm onto the ball plug and set it down with some support to cure in the pose I wanted.
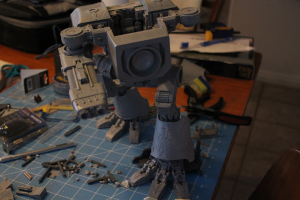
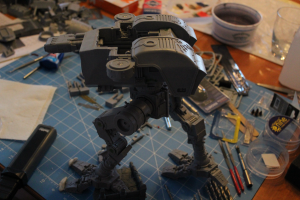
As with all of these, leave it to cure for 24 hours before moving on. Did a test pose of the whole body after this one finished, then moved on to doing the same thing with the turbo laser. I wanted a down-angled pose for the turbo laser, so it’s a bit different than the plasma blastgun was. These magnets hold the arms perfectly (thanks to some really good advice on these from justinhardin over at 30mm madness), no wobble at all. I think I made the right choice in going for this size and the placement I did within the arm. The cuts are a little ugly and show a bit of magnet through them due to some unevenness, but I think I can probably repair those with green stuff (I still need to look at it closer).
I didn’t do another pose shot with the turbolaser attached because it doesn’t balance very well with both arms attached. It stays on, most of the time, but only just; it’s a bit nose-heavy and wants to fall off the waist unless I have the upper carapace on there with the inside-vent-section on to balance it out (not easy to get to stay since none of that is epoxied yet). Since it balances just fine without the arms attached, I’ll epoxy the waist that way, then it should be plenty strong enough to balance it with the base and all the other stuff attached.
Next up, adding ankle pistons, making the base, and adding greebles. After that, trying to decide on the color scheme (another one of those big decisions I talked about at the beginning of the post.) I still am not sure what colors I want to use; I like the warp runners but everyone does that, and I’ve been looking around for other ideas (considering a variation on the black, white, and silver one that Worthy Painting did recently).
Anyway, the next post will be on some stuff I’ve already done, but the painting is going to be slow in coming. I don’t have a ton of free time and I still need to decide what to do with it.
