magnets

All posts tagged magnets

Time to do the arm magnetizing. I was both excited and terrified of this part. I’ve summarized titan construction to my friends a couple of times as a series of decisions you have to make, and some of them are very hard. They’re the type of decision that if you get it right, the model looks awesome; and if you get it wrong, you may have wasted 500 GBP.

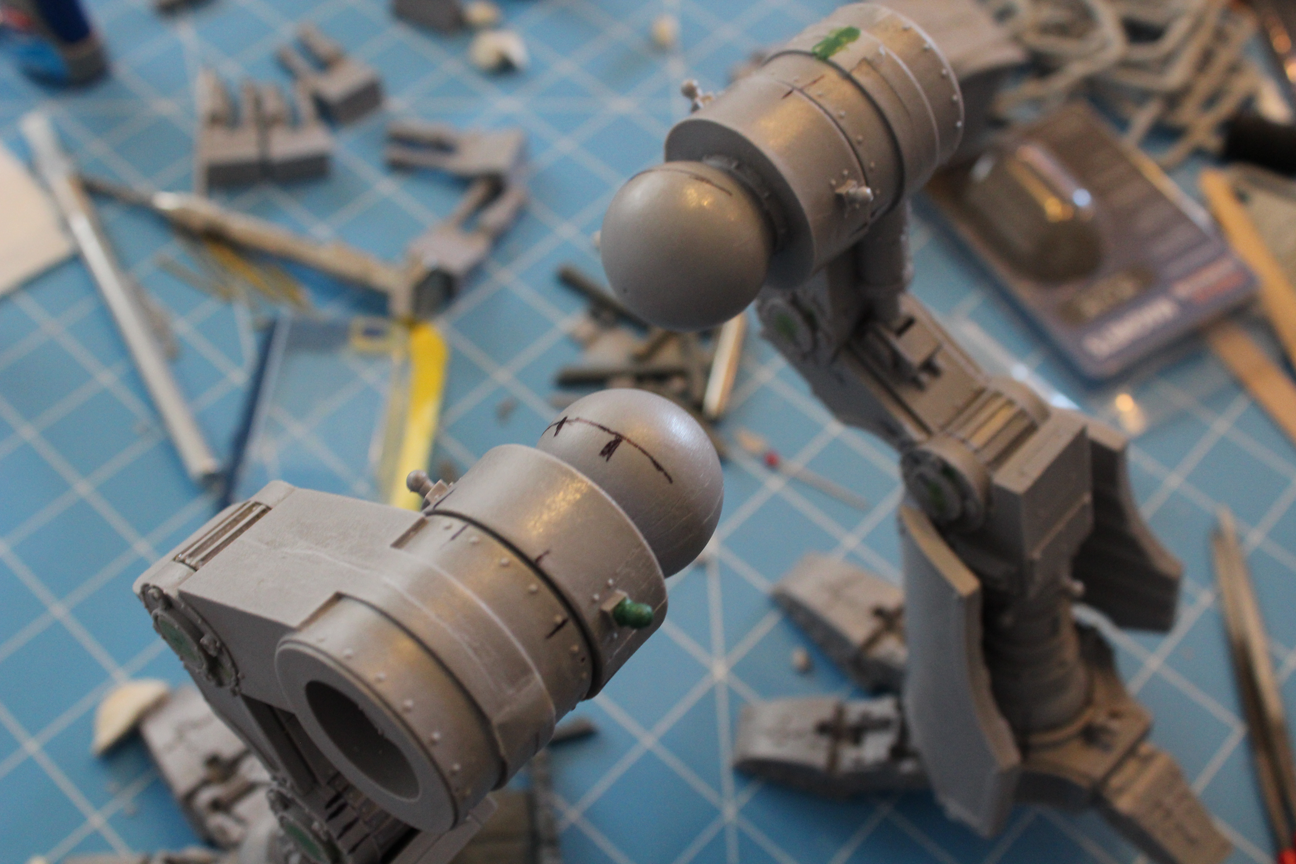
Well, figuring out the arms ended up not quite as good as I wanted it in a couple of respects (cut wasn’t quite straight, magnets not quite centered), but turned out better than I hoped in most others.

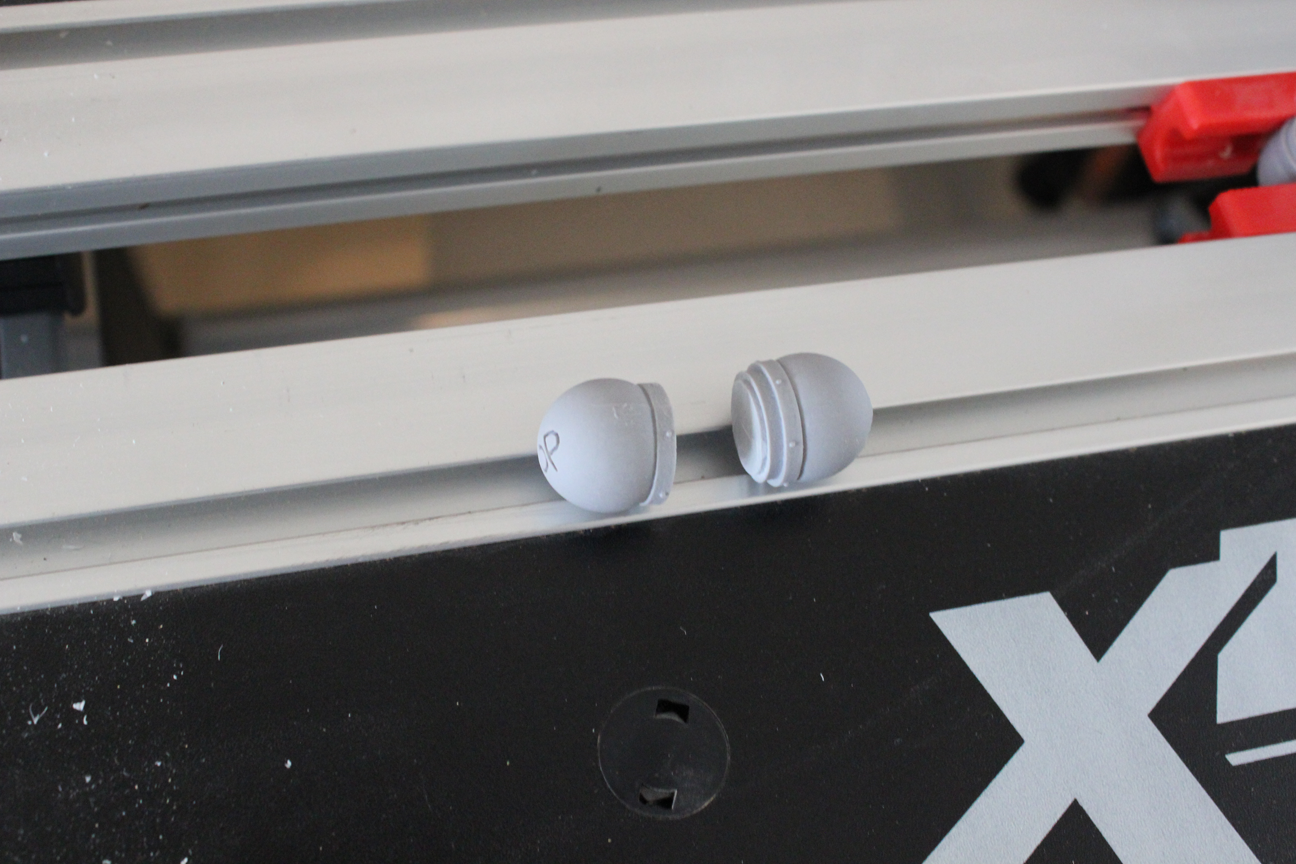
First off, on advice from the guy who runs the blog 30mm Madness, I decided to go with K&J’s stepped magnets, and went with the 1/2″ x 1/4″ thick variety. I was worried they may not fit with enough space left over in the arm joints, so I initially considered a different way of mounting the arms than the one recommended on 30mm Madness.

My plan after measuring sizes was to put one magnet inside the ball socket on the arm and hold it in with epoxy. I’d probably need to drill out a bit of the socket for the magnet with a Forstner bit. I could then sheer off the corresponding ball plug and mount the magnet in there, with the added space of the wider ball plug providing me lots of resin in which to mount the magnet. This approach would have the added benefit of having very little work if/when I ever bought additional Warhound arms. Additionally, if the cut was ugly, it would be mostly hidden by the inner part of the weapon arm’s ball socket.

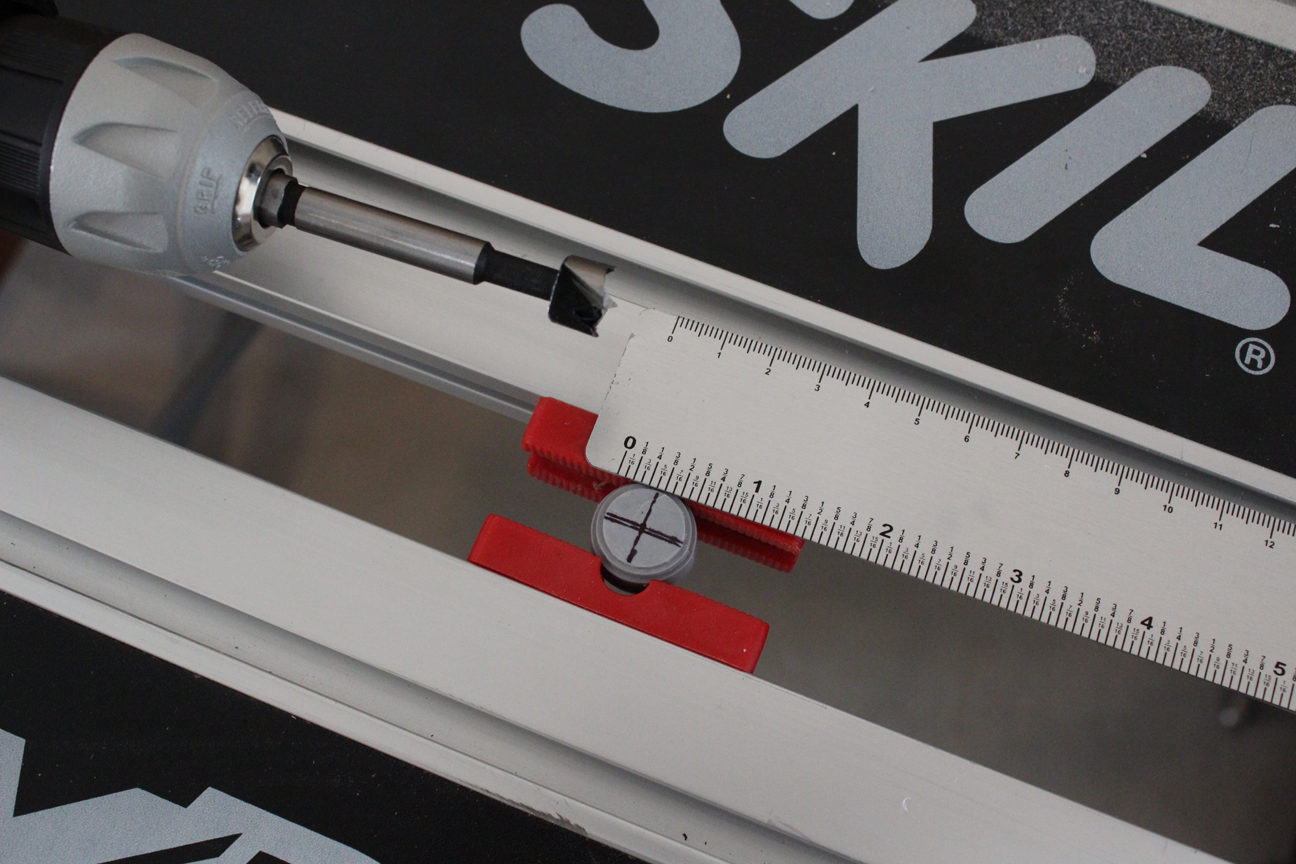
The alternative, was to do it the way 30mm Madness recommends: cut the arm section with ball plugs in half, epoxy one half into the main body’s shoulder joint, and the other half into the weapon arm, with magnets mounted in each half. I had measured the width of the arm section and knew it was bigger around than the magnets, but it wasn’t by a whole lot, so I was worried I’d screw it up or there wouldn’t be enough resin to support the magnet well. The downside here is more work for new arms, the upside is that it would be significantly easier to get the angles right on the cuts. If I screwed up the cut and it was ugly, it’d be out in the open for everyone to see.

In the end, I decided to do the second approach, because I was more confident in my ability to cut straight through the middle of the ball joints than I was in my ability to get the angles right if I did the first approach.

armBallsCut armyJointDrillingMagnets

Continue Reading

Been a while since I’ve updated; there have been a lot of happenings around here, and unfortunately, very few of them Titan-related.

It looks like I forgot to take pictures of the feet epoxying part.  Fortunately, it was relatively straightforward: I just put a bunch of JB weld in the joints and around the pins, then put the toes on and made sure there was plenty of it in all the sockets, then placed the foot in its posed position, and let it sit there for 24 hours to cure.  Only the left foot needed epoxying, the right foot was already pinned and superglued with the exception of one pin on the rear toe.  I just left that one upside down to cure.

Next up I epoxied the legs.  Looks like I didn’t take any during pictures of this either.  I seem to remember thinking something to the effect of it being straight-forward, so I didn’t need to take any pictures of it.  That’s irritating, because there were a lot of those situations in everyone else’s blogs that I looked at before starting my titan, and the parts that seemed straightforward to them were never straightforward to me.  And it kind of defeats the purpose of this blog a bit that I did that…

I’ll try to make up for it with description.  After mixing up the JB weld, I started in the knee joints; note that the piston on the rear of the thigh needs to be cut to size before you do this part.  If you’ve got pins in this joint, you’re not going to be able to fit the piston up into its slot after epoxying/inserting the pins.  So you need to have it measured and in place before you actually start epoxying the joints.  I had originally planned to use superglue for these because I could, but it occurred to me that while I was getting the rest of the joint in place the superglue would set before I was done, leaving me with a likely out-of-place and set piston.  No bueno, so I just decided to use JB weld on it too, which was fine; with the way the thigh pistons are slotted, it’s not going to be going anywhere once the rest of the knee joint is posed.

Doing the actual epoxying was a fairly simple matter.  Just score the inside of the joints with a sharp Xacto knife or something (provides some friction for the epoxy to grab on better) and then smear it on the inside of the joint, then repeat for the thigh piece.  I also put some down into the pin holes a bit.  However, I was using a toothpick, so I couldn’t get it that far down in there. After that, stick the pieces together, try to avoid epoxy-smearing, and then stick the pins into their holes. It turned out for me that the pins pushed a lot of their epoxy out the other end when I got them all the way in.  I used a handy toothpick to make sure they were roughly centered in their holes, wiped excess epoxy off with a paper towel, and moved on to the next joint.  Repeat for each joint on each leg.  Once that was done, I stuck them in their respective feet and left them to cure for 24 hours.  Note that the ankle joints were not epoxied yet at this point.

Once that was done, I did the hip joints and got them in their properly marked positions, epoxied and that was it.  Here’s a picture post green stuffing (which happened after).

legsGreenStuffedBallsMarked

Continue Reading